# How to Remove an Embroidered Logo From a Jacket Without Damaging the Lining
# 
You have an old jacket you actually like, except there's this logo stitched right on it that has to come off. Now you want a blank surface to put something new there. Either way, the moment you start tugging at those stitches, one worry creeps in fast: what if the lining tears?
Honestly, that worry makes sense. I've seen people grab scissors and just go at a logo, and they end up with a hole that won't close back up, or a lining so puckered it looks worse than the original patch did. After handling more jackets than I can count over the years, I noticed something. The ones that got wrecked almost always had one thing in common, somebody rushed it or grabbed the wrong tool for the project.
If you're trying to figure out[ how to remove embroidery from a jacket ](https://www.truedigitizing.com/blog/how-to-remove-embroidery)without tearing up what's underneath, the answer is really just two things: go slow, and start from the inside. That's it. Same goes if you need to remove embroidered patch work instead of a full logo, the steps below work for both since patches get stitched down the same way.
This guide breaks the whole process down so your jacket comes out looking refreshed instead of ruined.
Well if you're planning to put a new design in that same spot later, this same care matters even more. A clean removal makes the surface ready for[ re-digitizing a jacket]( https://www.truedigitizing.com/services/custom-embroidery-digitizing) logo without any bumps or leftover holes showing through the new stitching.
Let's get into it.
# Why Removing an Embroidered Logo Needs a Careful Approach?
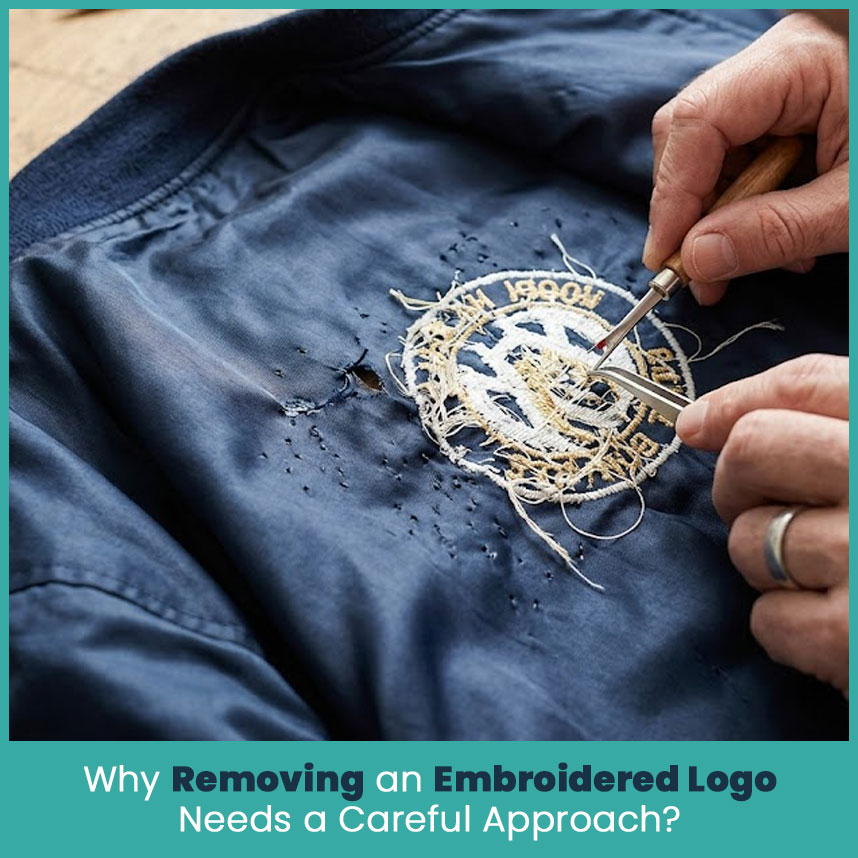
Embroidery doesn't just sit on top of your jacket like a sticker. The needle goes straight through both the outer fabric and the lining, over and over, sometimes thousands of times for one design. Every single stitch you're about to pull out was once a hole punched through that fabric, and the material had to stretch a bit each time to let the needle pass.
**What Makes the Lining Vulnerable During Logo Removal?**
Linings are almost always thinner than the jacket shell.
* Bobbin thread sits right against the lining, and cutting it carelessly can nick the fabric underneath.
* Dense stitching packs more needle holes into one spot, which weakens that whole area.
* Silky or satin linings catch on anything & one small snag can turn into a run before you notice.
**Common Mistakes That Damage Fabric or Lining**
Most of the damage I've seen happens because someone wants to get it over with fast.
* Yanking threads out instead of cutting them, which drags and tears the material.
* Cutting too close to the jacket itself instead of just the thread.
* Working only from the outside and skipping the inside out step, which puts all the stress right on the lining.
# Tools You Need Before You Start
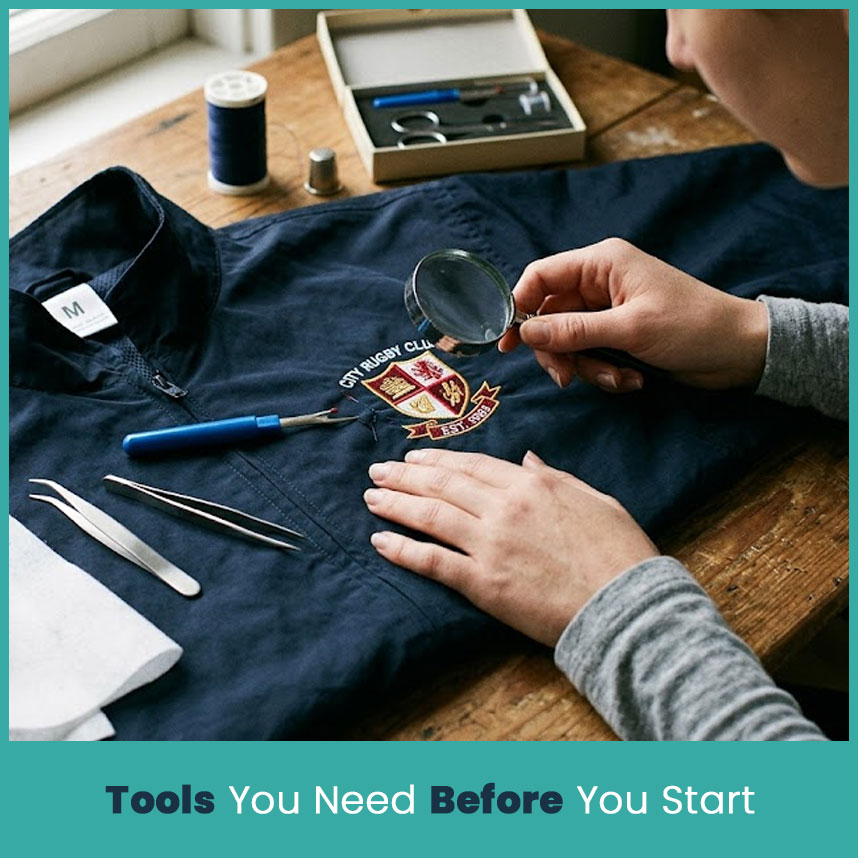
Nothing here is fancy. Actually, most of what you need is probably already sitting in a basic sewing kit.
**Seam Ripper, Tweezers, and Small Scissors**
The seam ripper does most of the work. It slides right under a stitch without grabbing at the fabric around it. Tweezers let you pick up thread ends without touching the material with your fingers, and small sharp scissors help you snip close without nicking anything you shouldn't.
**Optional Tools for Stubborn Stitches (Stitch Eraser, Embroidery Scissors)**
Some logos have so muc**h stitching packed in that a seam ripper alone takes forever. A stitch eraser looks a little like a tiny electric razor and chews through thread fast, leaving the base fabric untouched. Embroidery scissors, with that narrow curved tip, also make it easier to sneak under tight stitches.
**Fabric Stabilizer or Interfacing for Backing Support**
Once the logo's gone, that spot on the jacket can look thin or a little loose. Keep some stabilizer or interfacing nearby so you're ready to back it up right away, especially if new stitching is going there eventually.
**How to Check the Jacket Before You Begin?**
This is the step most people skip, and it's usually where things go wrong. Make sure you actually take a good look before touching anything.
**Identifying the Fabric Type and Lining Material**
Cotton, nylon, polyester, wool, they all behave differently under pulling and heat. Nylon, for instance, shows needle holes way more than a heavier cotton twill would. Once you know what you're working with, you'll know exactly how careful to be.
**Checking Stitch Density and Thread Type**
Hold the logo up toward the light and look at it from the back side. The dense parts, usually letters and outlines, look darker and tighter than the rest. That's where you'll want to slow way down.
**Testing a Small Area First**
Find a spot under the collar or inside the cuff and pull two or three stitches there first. You will get an idea of how the fabric reacts before you get anywhere near the actual logo.
# Step by Step Guide to Removing an Embroidered Logo
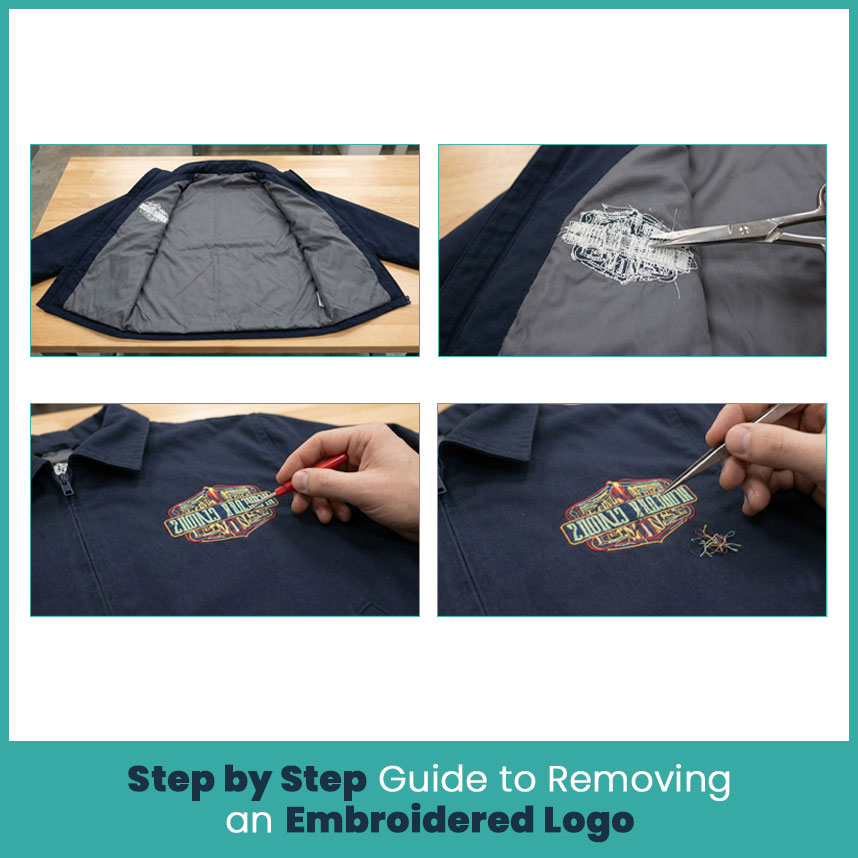
Here's the part you're really here for.
**Step 1: Turn the Jacket Inside Out to Access the Lining**
* Flip the whole jacket so you're facing the lining, this gives you a clear shot at the bobbin threads.
* Lay it flat on a table instead of balancing it on your lap, since that keeps the fabric from sliding around.
* Find the logo from the back, it'll look like a dense little patch of thread pressed into the lining.
**Step 2: Cut the Bobbin Threads From the Inside**
* Snip the bobbin threads one at a time with small scissors, never grab a bunch at once.
* Cut right at the stitch, not near the fabric, so you don't nick the lining by accident.
* Break it into small sections instead of trying to cut through the whole design in one go.
**Step 3: Loosen the Top Stitches With a Seam Ripper**
* Turn the jacket back to the front and slide the seam ripper under one stitch at a time.
* Push the ripper away from the fabric, never toward it, or you risk catching the material.
* Slow way down around letters and curves, since the stitches sit closer together there
****S**tep** 4: Pull Out Loose Threads With Tweezers****
* Use tweezers to grab loose thread ends instead of pinching with your fingers, you get way more control.
* Pull straight up and gently, not sideways, so the fabric doesn't stretch out of shape.
* Keep checking both sides as you go to make sure nothing's still holding on.
**Step 5: Remove Remaining Stabilizer or Backing**
* Peel off any stabilizer or backing that's stuck to the lining.
* If it feels glued down, a little steam loosens it up without any force needed.
* Give the area a light brush with a soft cloth once it looks clear of thread bits.
**How to Protect the Lining While Removing Stitches?**
Working Slowly Around Curved and Dense Stitch Areas
Curves and lettering cram more stitches into less space, and that's exactly where rushing leads to holes. Take it one stitch at a time through these spots, no shortcuts.
Using a Flat Surface to Avoid Fabric Pulling
**Working on a table instead of holding the jacket up**
keeps the tension even across the whole piece. Pretty sure this only one habit saves more jackets than any tool on this list.
**Handling Delicate or Silky Lining Fabric Separately**
Got a satin or otherwise delicate lining? Slide a piece of thin cardboard or cardstock underneath while you work. Gives you something solid to cut against without putting the fabric below at risk.
**What to Do if the Fabric Gets Small Holes or Marks?**
Every once in a while, a hole shows up even when you've been careful. That's normal, and most of the time it's an easy fix.
Fixing Tiny Needle Holes With Steam or Light Pressing
Hold an iron a few inches away and hit the spot with steam. On tighter weaves like cotton or wool, this actually shrinks small needle holes right back closed.
**Patching or Reinforcing the Area From Behind**
If the fabric still feels a little loose, iron on interfacing pressed onto the back adds support without showing up on the front at all.
**When to Add a New Patch or Embroidery Over the Spot?**
If nothing seems to fix how the area looks, just cover it. A new patch or fresh embroidery over that spot is usually the cleanest way out & it hides everything underneath completely.
# **FAQs**
**Can I remove an embroidered logo without leaving a hole in the fabric?**
Yes, as long as you cut the threads instead of yanking them and take your time around the denser stitching.
**What household items help loosen embroidery stitches safely?**
A seam ripper, a pair of tweezers, and a warm iron for steam cover most jackets just fine.
**Does removing an embroidered logo damage waterproof or insulated jackets?**
It can, if you're not careful. These jackets usually have a coated lining that scratches or peels off pretty easily.
**How long does it take to remove an embroidered logo by hand?**
Depending on how dense the stitching is, small logos take between 20 to 30 minutes.
Author Bio
Matthew Davi
Senior Embroidery Digitizer
I'm Matthew Davis, a skilled embroidery digitizer with more than 15 years of practical experience. I specialize in logo digitizing, 3D puff embroidery designs, applique digitizing, custom embroidery digitizing, and working with difficult fabrics. Over the years, I have worked with different fashion brands and production teams worldwide.
I always share simple tips and useful techniques to help both beginners and businesses improve their embroidery work.